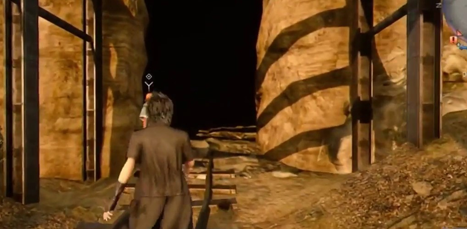
In the wee hours of Final Fantasy XV, after meeting Cindy and repairing your sweet ride, Regalia, your group is tasked with continuing south on your road trip to the city of Galdin Quay. On your way, you’ll pass by the entrance of the abandoned Balouve Mines. The sign out front reminds travelers that the place is full of varmints and daemons, and that it’s very dangerous. Which is code for “there’s probably something really cool here.”
Here’s some things you should know before you walk into the mines for the first time.
1. Do not fight the Aramusha.
When bumbling through the first floor of the dungeon, all will seem quiet and tame. You’ll meet your first monsters, Goblins, on the second floor, but outside of a numbers advantage, they aren’t much to worry about. Once you approach a long rail bridge, something tall and ominous will emerge from the shadows. If you choose to investigate further, the deadly Aramusha will appear. At first glance, you’ll notice its twisted demon face, incredible height, and long, sharp blade at its side. Then you’ll notice the biggest issue: it’s level 52! It was at this point where it dashed to my Noctis and effortlessly knocked him off the bridge to the ground below, making me in need of a Phoenix Down and a new set of ideas.
Should you survive this encounter, you’ll be free to continue exploring the mines. Just know that the Aramusha is waiting deep in the heart of the dungeon to finish what it started. (S/O to Jing for the footage above.)
2. Watch out for mine carts.
The first thing you’ll notice while traversing this underground labyrinth is all of the rails. The mine carts may no longer be used for hauling ore, but they are still plenty operational. Goblins re-purposed them as a mode of transportation for them and tools of harassment against you. Mine carts will frequently go whizzing by your party – sometimes filled with Goblins, and if they hit you, they will do damage and knock you over. They can be avoided, but you have to keep your ears open and your eyes peeled. Sometimes, members of your party will help draw attention to them, so listen for their reactions as well.
3. Grab some good early game gear.
You’ll begin to come across lots of items fairly quickly as soon as you’re let loose into the world. As many of them are useful (like food ingredients), you’ll notice that the kinds of things you find in the Balouve Mines are a different caliber of item. Keep a look out for things like the Mythril Shaft or Chrome Bits, as these items sell for a good amount of gil. Saving them is a good move, too. You never know if they may be useful in other ways.
Equipment wise, you’ll find a Rainbow Pendant, Emerald Bracelet and a Circlet across the four floors. At the bottom floor near the elevator, be sure to also grab the Friendship Band. It will increase the range in which Link Attacks will activate between Noctis and his allies, and it can only be equipped by them.
4. Remember to camp.
If things get hairy inside the mines, remember that camping restores maximum HP, turns in experience points for leveling, and can provide a new food buff to help you get the edge on your opponents. The Emmelle Haven campground is just north of the dungeon entrance and is always there for you, should you need a break.
5. Ok, if you HAVE to fight the Aramusha…
So, your interest has been piqued beyond convincing. You’re going to at least TRY to kill the Aramusha. As I would normally advise you to just wait until you’re a higher level, there is a way to kill him right now. It’s cheesy, and you might need a shower afterwards, but it’s doable. (S/O to Trunx182 for the footage.)
Step 1: Acquire a gun. The easiest way to get a firearm for Noctis to equip is waiting a few days in Hammerhead for the Weapons Truck to show up. There, you can buy new weapons/upgrades to the ones you have already. Be sure to equip the gun into one of your active slots before making your way back to Balouve.
Step 2: Camp and Save. Just to be safe. This thing can still totally kill you in one hit.
Step 3: Perch. When you enter the quarry that the Aramusha lurks in at the bottom of the fourth floor, you’ll notice that there are several elevated positions surrounding the main battle area. Find one that is sufficiently out of range of the Aramusha’s melee attack, and get comfy.
Step 4: Shoot a lot. A whole lot. He’s got plenty of HP. Don’t be courted into trying to help your friends as they scream in pain while being crushed under the enormous level advantage he has on you. You asked for this, remember.
Step 5: Profit. Well, sorta. You’ll need a key to finish the quest, and you don’t get that until a little later, so be prepared to return.
If you want more information, or have info you want to share with the world, come get active at our Final Fantasy XV Wiki!