Battlefield 1: In the Name of the Tsar is mostly about the Russian front of World War I, but it would be remiss to neglect the fact that Russia underwent a bloody civil war during and after the Great War. Thankfully, two of the latest Battlefield 1 expansion’s six maps revolve around the conflict, which pitted the socialist Red Army against the anti-communist White Guard. One of the two Russian civil war maps is the stunning Tsaritsyn, and it’s one of the most visually impressive Battlefield 1 maps to date. Use this guide and tips to ensure your side emerges victorious.
Map Overview
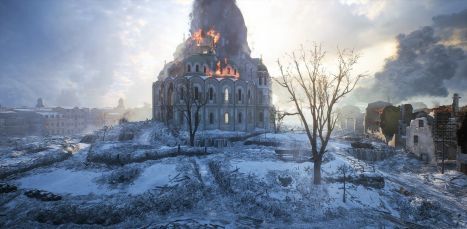
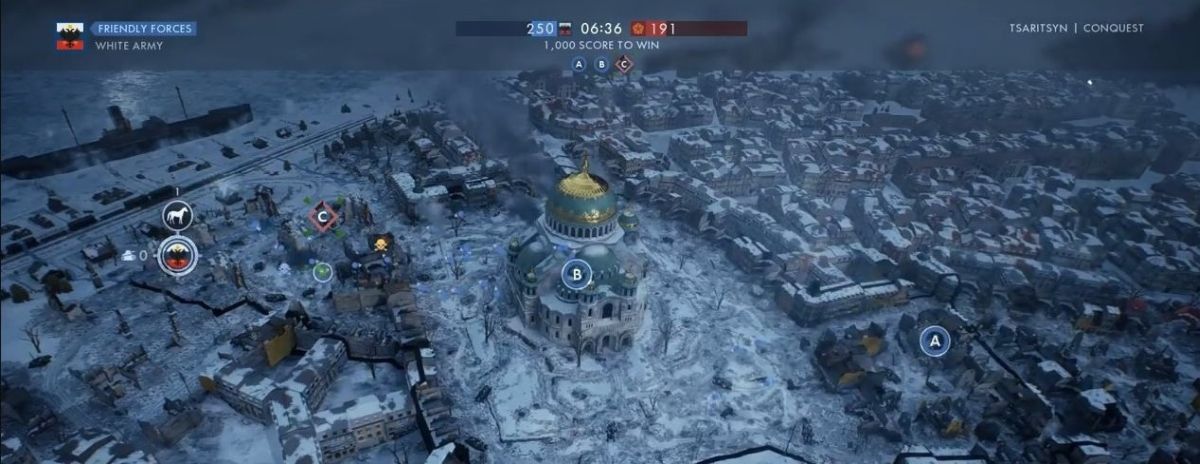
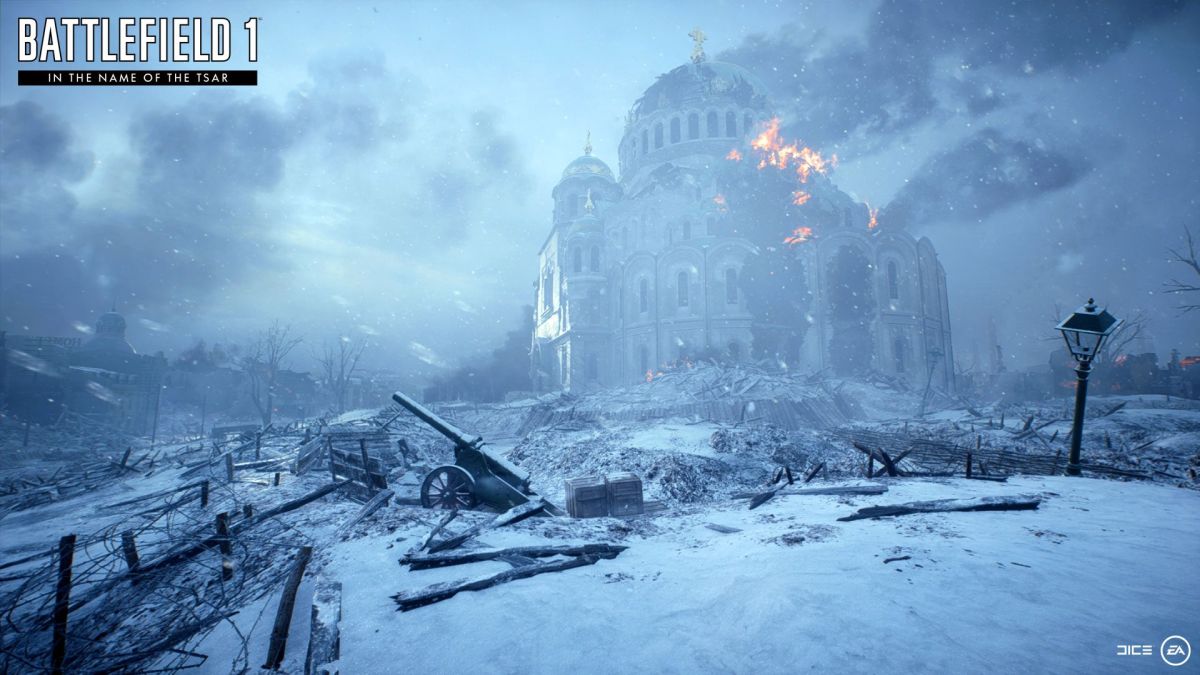
Tsaritsyn sees players joining either the Red Army or the White Guard as they battle for the breathtaking Cathedral of Light in the center of the map. City ruins lie to the southeast and the northwest, with a large, trench-filled no-man’s-land surrounding the Cathedral on all sides. Each team receives a landship tank which can be used to take control of capture points on the eastern and western portions of the map.
Spawn Information
The White Guard pushes towards the cathedral from the west near the Volga River, while the Red Army pushes from the east through a destroyed urban area
Key Features And General Tips
Want to learn more about the map’s features and how to utilize them to your advantage? Here are some helpful tips to help you achieve victory.
Check Your Corners
On the eastern portion of the map near where the Red Army spawns, enemies could be hiding anywhere. The ruined buildings that make up the town are filled with doorways, windows, hallways and upper floors that makes it incredibly easy for the enemy team to hide and ambush the opposition. Be sure to listen for enemy footsteps and check rooms carefully when attempting to clear out the enemy team to capture the objective. Death could be lurking behind every corner.
Use Your Team’s Vehicle Effectively
Tsaritsyn is definitely a map focused on infantry combat, but the lone tank each team receives is vital to victory. As mentioned above, the tank can be an important tool when it comes to capturing the points in the western and eastern urban areas of the map. The vehicle is unable to fit inside the central cathedral itself, but it can be used to great effect around the outside of it. Use the tank to break up enemies attempting to cross the no-man’s-land when defending the point, or use the tank alongside a surge of infantry to make a push inside the cathedral.
Be Smart When Storming The Cathedral
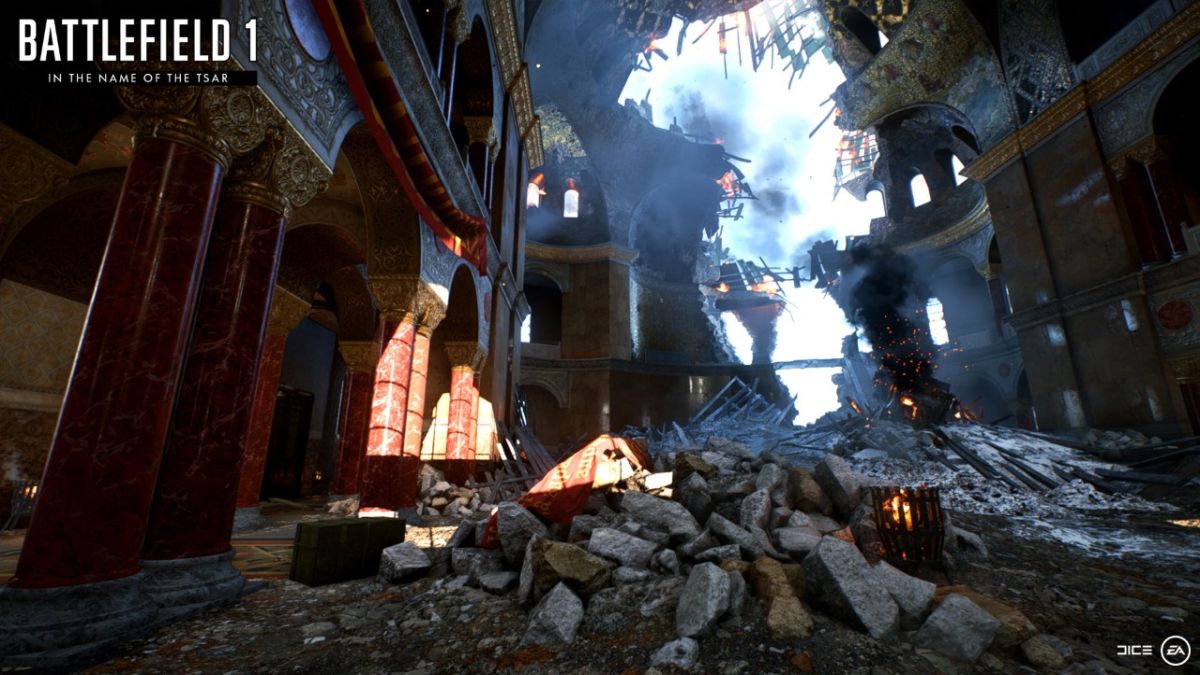
Fighting to take control of the Cathedral of Light can be a nightmare. The building itself is massive, and being the focal point of the map means it’s always hotly contested. Thankfully, there are plenty of ways to gain the upper hand in the battle for the cathedral. For starters, there are multiple entrances into the building. If you find one entry way too heavily guarded, try an assault on another. It’s almost impossible for the team occupying the cathedral to properly defend every entrance. Another tip to remember is that enemies on the outer rim of the cathedral or on the upper floors can’t capture the control point. To do that, they must be in the central area of the building. Use that fact to your advantage.
Class Tips
As is the case with every map, each class will have areas and tasks they excel at and others that they will want to avoid. Make sure you’re prepared with these class-specific tips.
Assault
The assault class truly shines on Tsaritsyn. Their shotguns and close-range SMGs are perfect for the tight, building-to-building combat found in the eastern urban area of the map as well as inside the Cathedral of Light. Stick to those areas and you’ll be earning plenty of kills. Assault players will also want to keep an eye out for the enemy tank, which is often used to capture the outside control points on the map.
Medic
For Tsaritsyn’s close quarters fighting, medic players will likely want to equip a trench variant of their favorite rifle when going into combat. The newly added Federov Avtomat is also an excellent choice for clearing buildings and battling in the trenches. As always, stay near your teammates for healing and reviving purposes, especially when defending the cathedral. Keeping your squad alive is vital to holding it.
Support
There are a couple of excellent spots support players might want to set up in order to lay down some heavy suppressive fire. One such spot is inside the cathedral. Players on the upper balcony can fire down upon those sprinting around in the middle of the building, making it perfect for the support’s heavy machine gun weaponry. Laying down fire around the outside of the cathedral is also a good idea, as impatient players will sprint across no-man’s-land to the cathedral rather than keeping their heads down in the trenches. Bringing a wrench along for the battle can also be useful, as keeping your team’s sole tank alive longer can have huge benefits.
Scout
While Tsaritsyn definitely favors up close and personal combat, there are opportunities for scouts to deal some damage. As mentioned in the support class tip, often times enemy players will simply sprint across the no-man’s-land in an effort to make it inside the cathedral. Those players are perfect targets for snipers. The urban zone on the western portion of the map is far more open than the area on the eastern side, so scouts may want to consider picking off players there as well.
For more information on the weapons, maps and vehicles of Battlefield 1, be sure to check out the Battlefield 1 Wiki. Battlefield 1: In the Name of the Tsar expansion is available now for Battlefield 1 premium members and arrives September 19 for season pass holders.