Nowhere Prophet, the new card-based rogue-like RPG from Sharkbomb Games, can appear daunting from the outside. When you start your first trek to the infamous Crypt, you could be overwhelmed with all the information being thrown at you all at once. The in-game tutorial does an OK job at harnessing it all, but a little help is always useful. That’s where we – and specifically, the following beginners guide – come in. Hopefully by the end of the reading, you’ll have more than enough information to navigate the dangers of Soma.
The Prophet
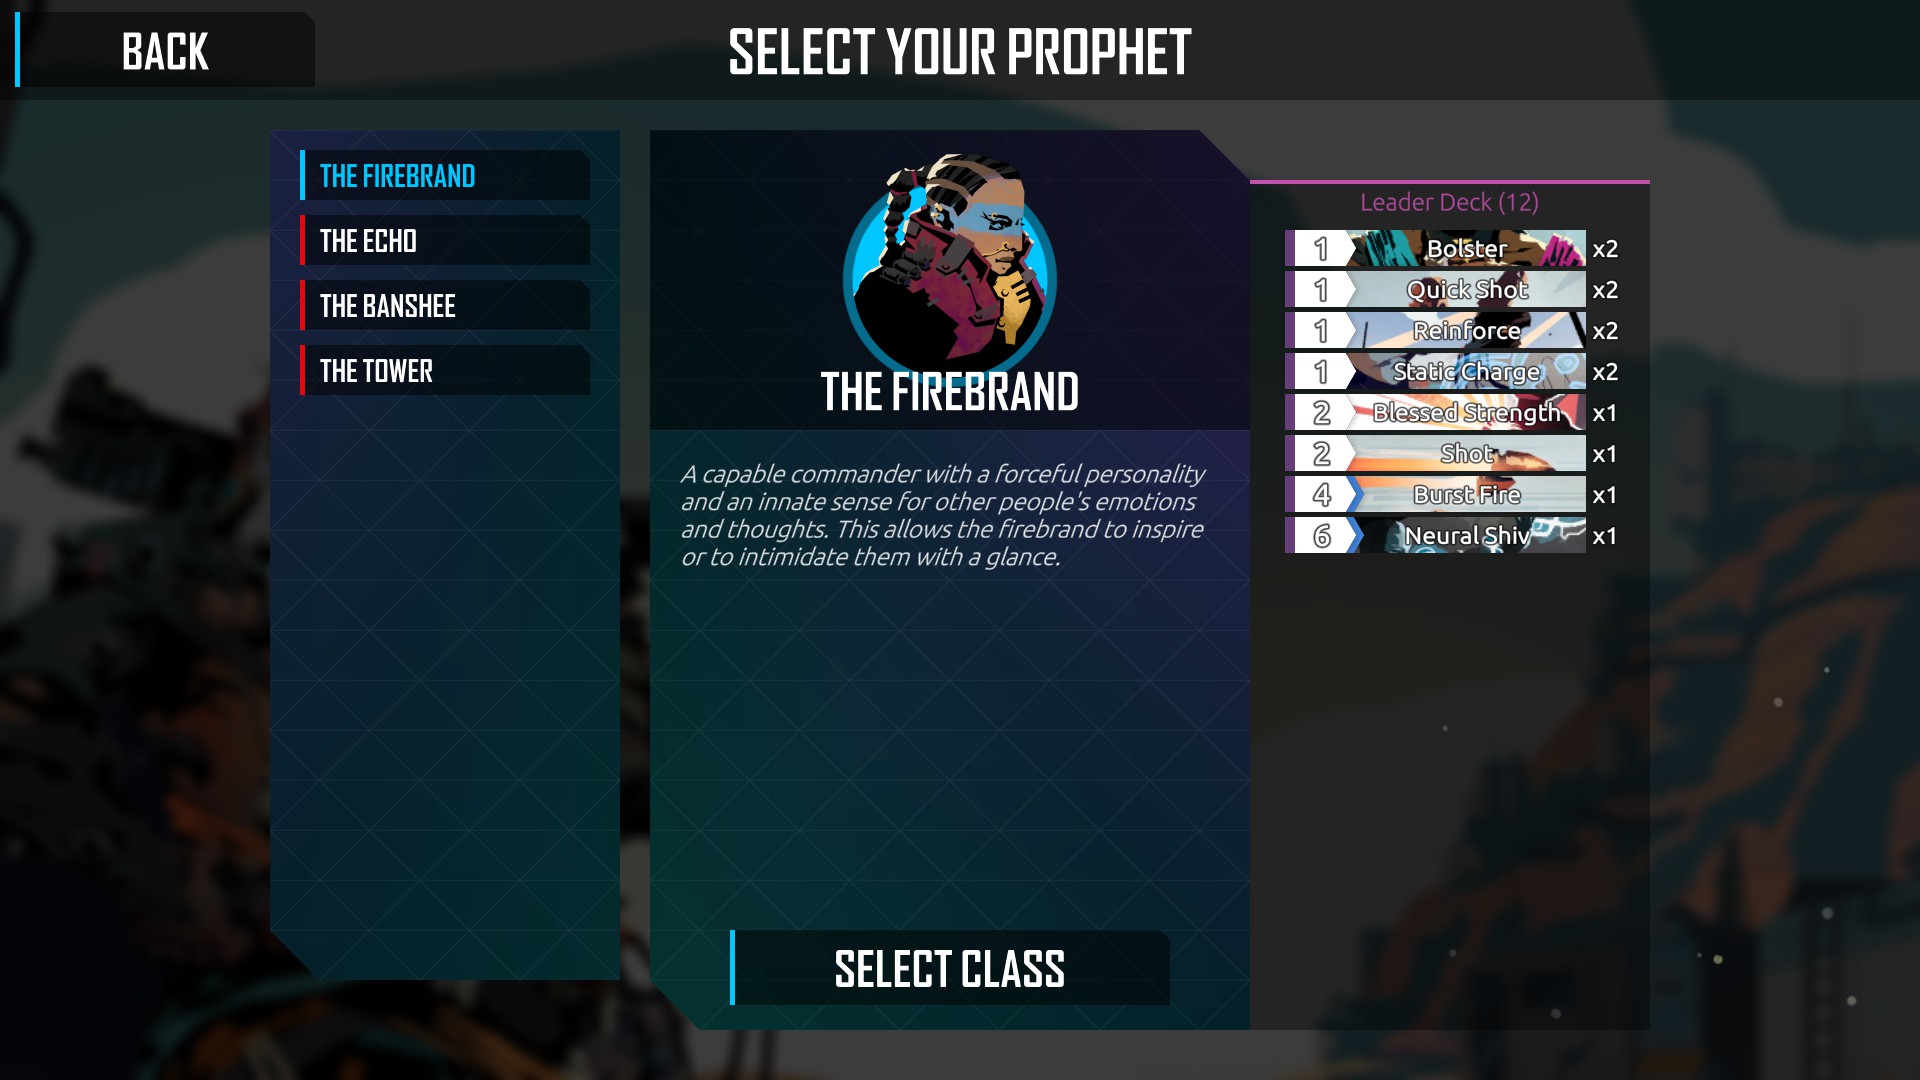
For all intents and purposes, the Prophet is you! As the fearless leader of a band of survivors, your convoy entrusts their very lives with you and your quest to the Crypt. Should something happen to you (like your HP falling to zero in battle) then the game is over, and your convoy disbands.
When starting a game, you can take up the mantle of one of four different classes of Prophets, each with their own specific strengths and weaknesses. The differences largely come from your Leader Deck, which will change dramatically based on your class.
Prophets can gain experience points and level up. When you do, you can choose a card from a random assortment of five to add to this Leader Deck. You also get a focus point, which will allow you remove a card from your leader deck that you might not want.
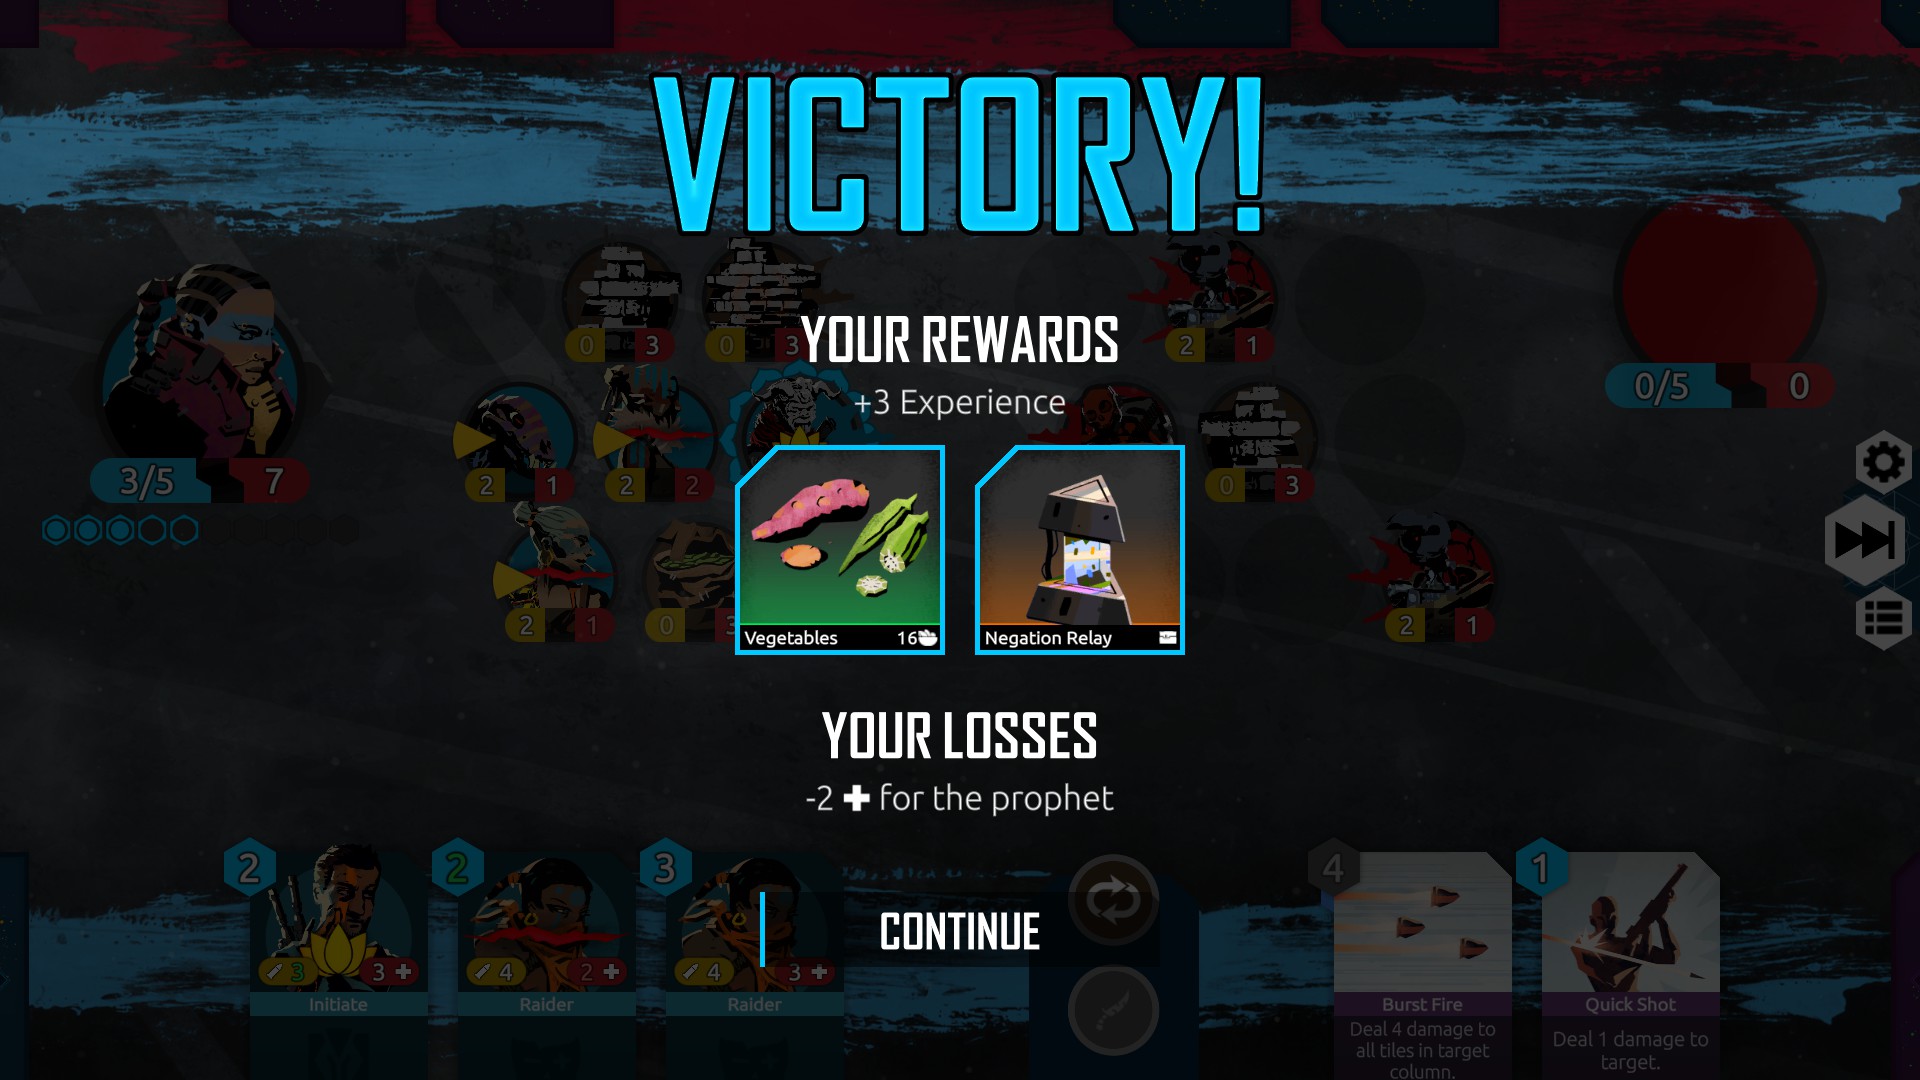
Prophets can also equip items and weapons. Each modifies your battles either passively or grants you a new active skill. You can also dismantle these objects to add a card to your Leader Deck, or sell them off for batteries, the currency of Nowhere Prophet. As Prophets are the lifeblood of the game, they are also far-reaching and super decisive factors on how your battles play out. Customize your Prophet wisely.
The Map
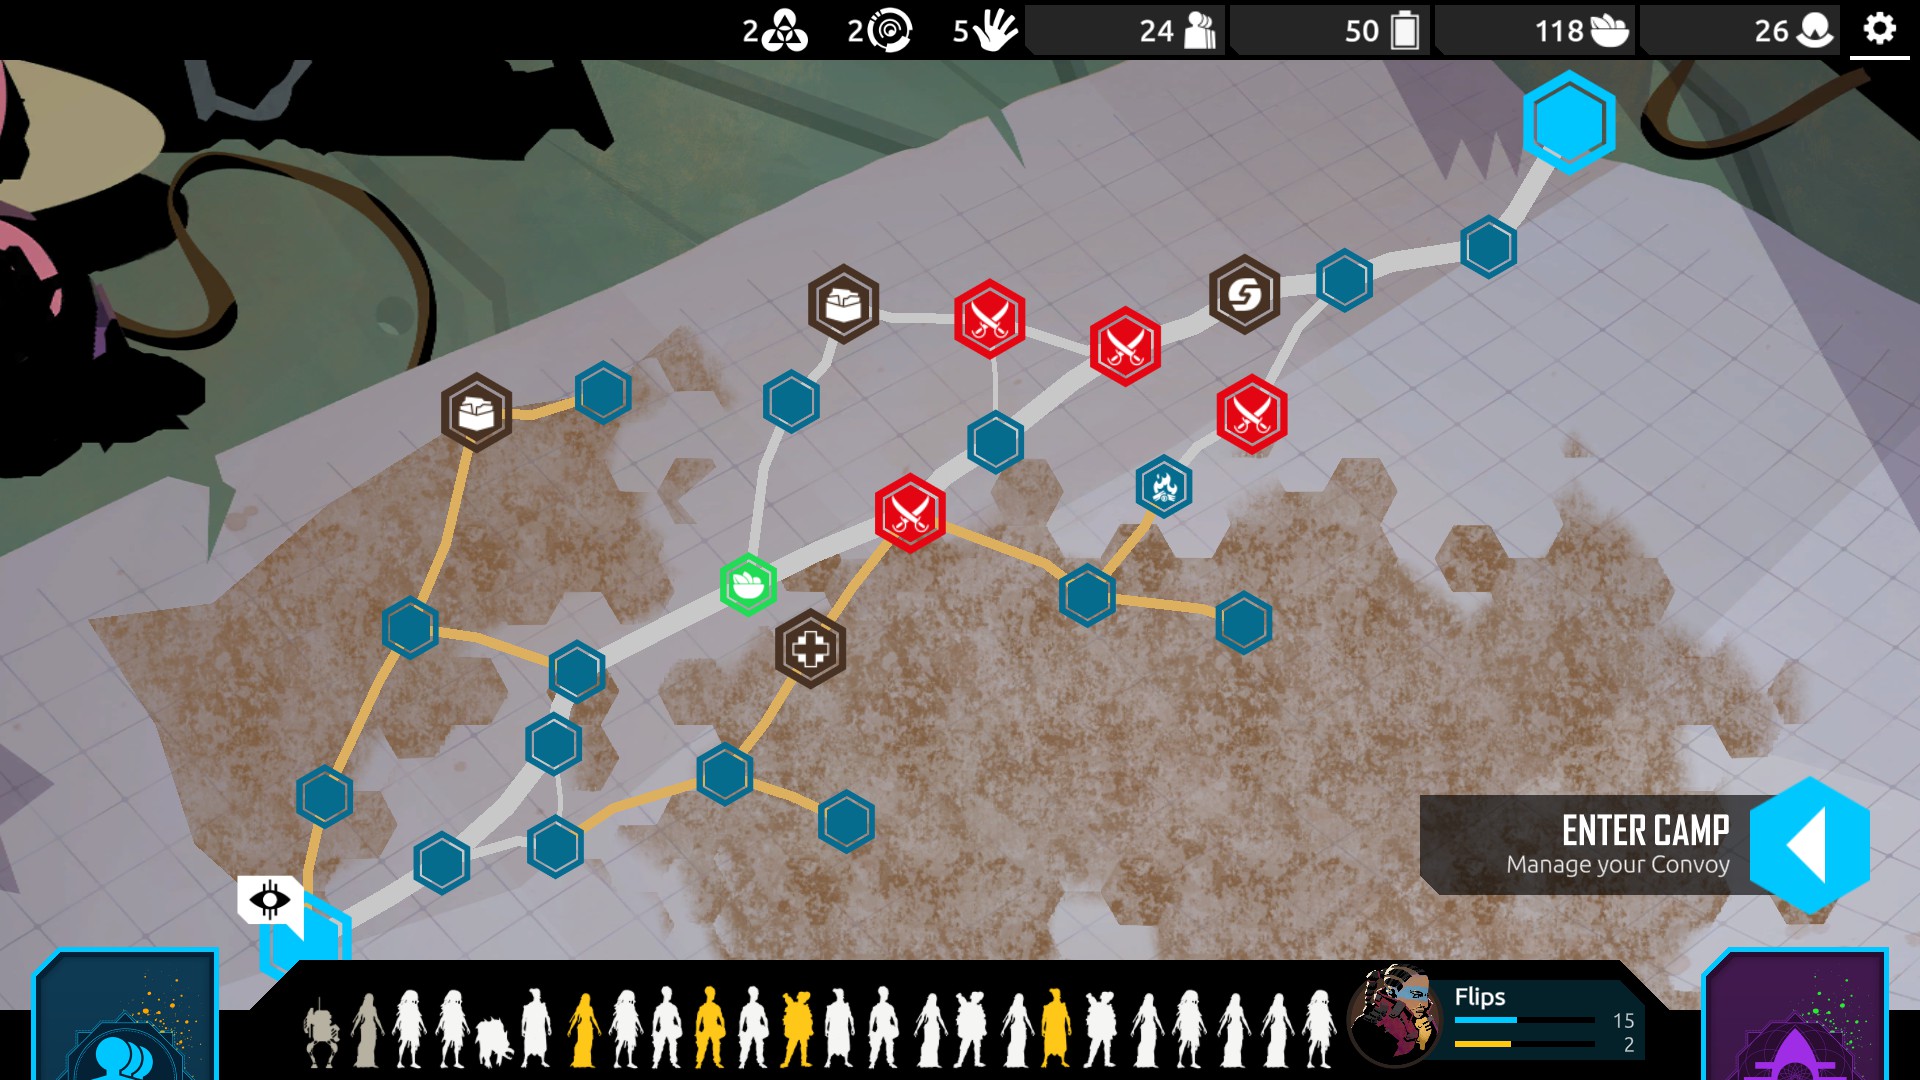
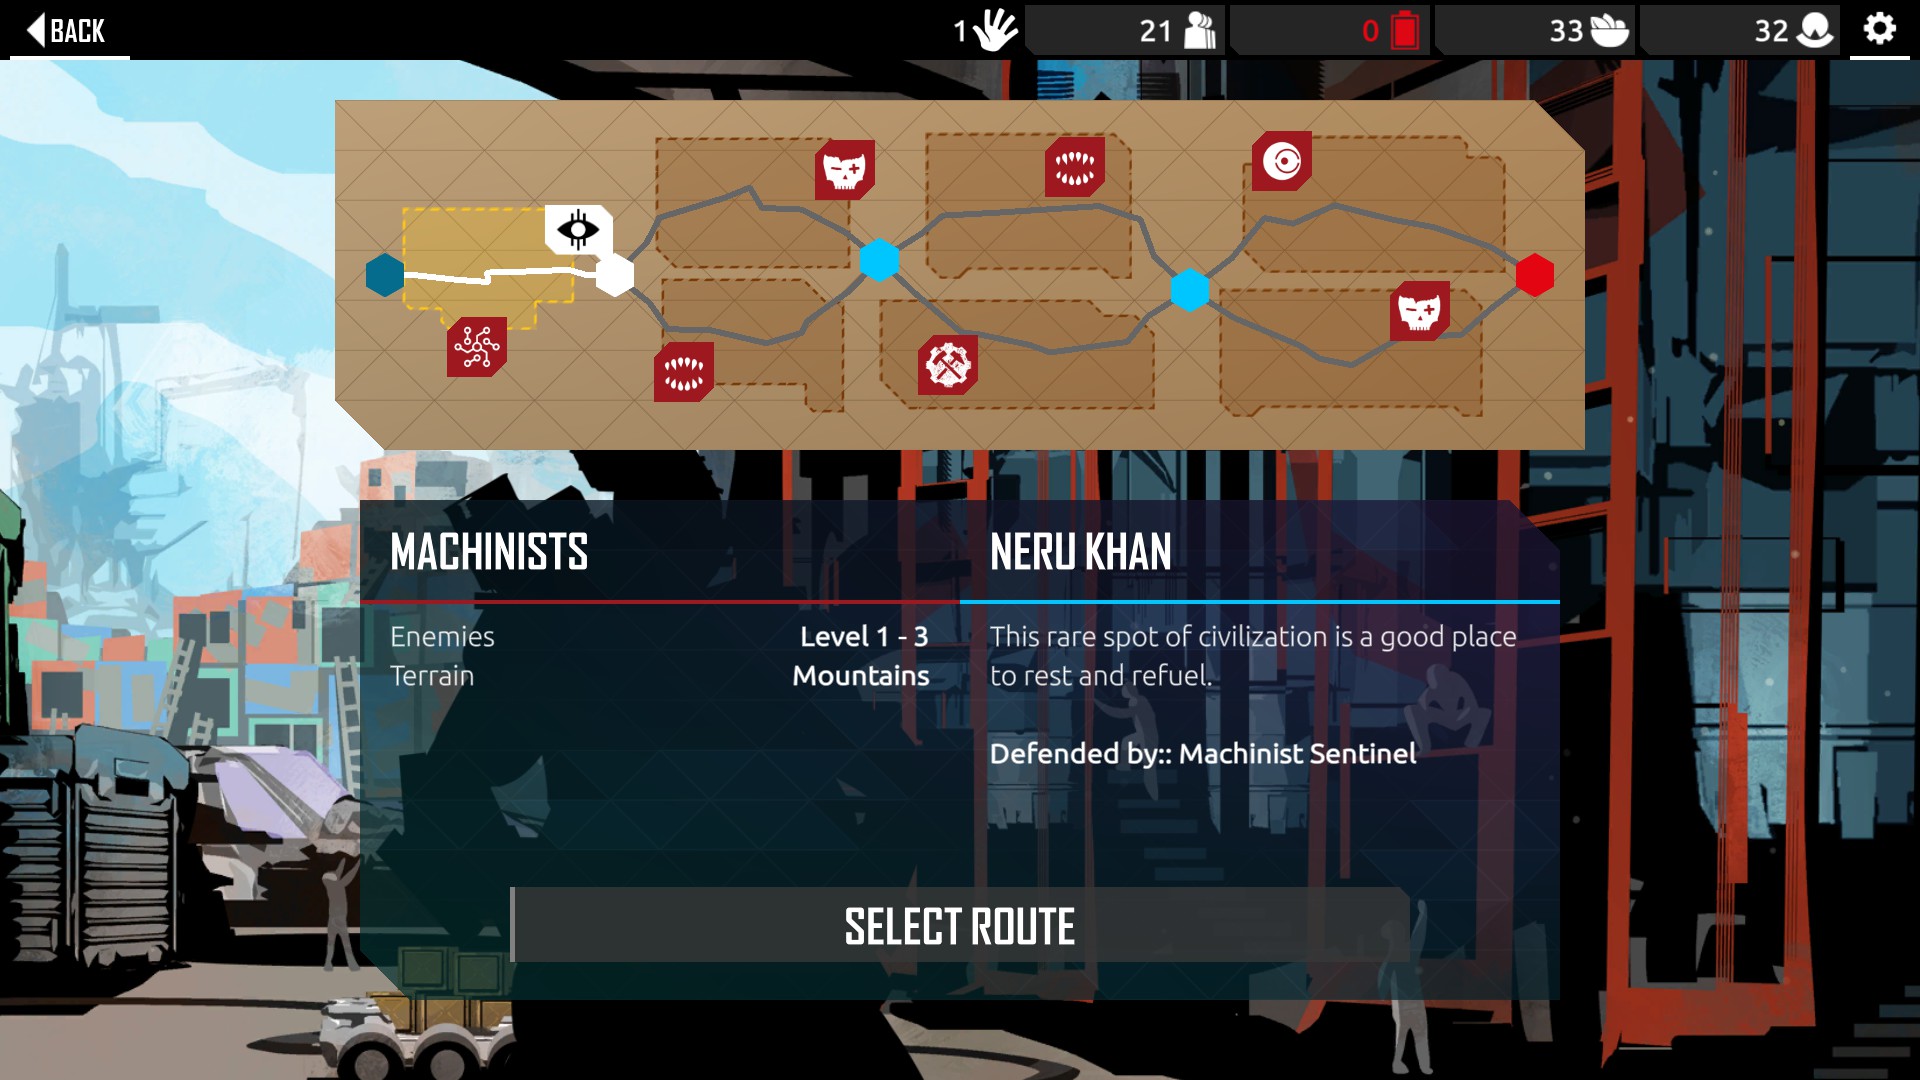
Your macro journey to the Crypt takes place on the overworld map. This map is a network of paths connected by nodes that will hold a bevy of different types of encounters. These can come in many forms:
- Crossroads: These are basic nodes that can contain any type of encounter. They’re marked but play hexes.
- Camps: These nodes are marked by blue campfires, and provide a safe place to rest and recover health for the party and the Prophet. You won’t be in any danger here.
- Fortifications: These red nodes are fortified strongholds of potential enemies. Sometimes, you can navigate your way around them, or talk your way out of a fight. If it does come to blows, expect a tough fight with potential for better rewards and more experience.
- Healing: Denoted by a medical cross, these nodes provide a place to heal, with the possibility of other amenities.
- Market: These nodes look a bit like a bag of groceries, or maybe clinking glasses? At any rate, they are marketplaces, which allow you to sell rare goods you may find in your travels, as well as purchase things like food, items, and mercenaries.
- Milestones: These are the filled in nodes at the end of each map section. You reach these, fight a boss, and enter a sort of super camp afterwards. Not only can you rest and restock here, but you can get into all sorts of other things, like gambling or haggling for rare weapons.
- Quest: Quest markers appear through normal game play, and are destinations you have to reach to complete it.
- Recruiting: These nodes that look like silhouettes of people are places where you can pick up more followers for your cause. Usually for some sort of fee in batteries, gold, or otherwise.
- Rewards: Reward nodes are usually just places to find a cache of goods unmolested.
- Unexplored: These craggy looking icons are places that have never been explored before.
Moving from node to node costs food and hope. You can usually buy or find food during events, but hope can be a bit more difficult to come by. Either way, planning your routes based on the cost of travel is super important. Also important is remembering that travelling on a road itself could place you in an encounter before you even get to a node. Stay sharp out there.

The Convoy
The body of your convoy are the followers. Each of your followers is a card in your Convoy Deck. You can place and remove Convoy members from the active deck at any time, and you can only have a Convoy Deck size of 30 maximum. Convoy members in the deck are at risk of injury and death via battle, while those outside of the deck are more at risk of harm from events on the road.
Followers come in different rarities denoted by colors behind their portraits: Common (White), Rare (Blue), Legendary (Purple) and Mythic (Gold). It’s good practice to assume that the rarer the card, the better. They often have better states, and more exotic special abilities, so be sure to keep them safe.
Safe from what, you say? Wounds, for starters. If you lose a card in combat, it becomes wounded. Wounded cards start battle with one damage, but are also one cheaper to play. If they get got in combat again, though, they are dead. Dead cards get a big white skull on them in the Convoy menu and are removed from the list. Cards can also be wounded and killed through events outside of combat, so be careful.
When individual cards make the finishing blow on an enemy, they become Blessed. Blessed cards get a buff to their attack which stays with them until they are wounded.
Individual convoy members can be useful outside of combat as well. Many of them can be relied on in specific moments to offer an option you wouldn’t have with out them. For example, some beast creatures can be used to intimidate would-be bandits. Some convoy members may be particularly good at gathering food from the wild. It’s up to you to measure their risk of using their strengths to your advantage versus potentially putting them and the rest of your followers in harm’s way.
Your starting convoy can be one of many archetypal themes of followers you can start the game with. A clan full of berserkers has different strengths and weakness that the group of technopaths. You have to meet certain gameplay milestones to unlock the total of nine different factions of followers you can choose from.
The Fight
Combat is inevitable in Nowhere Prophet. It can also get pretty complex for a card game. There’s some standard information you should definitely know before getting into the thick of it, though.
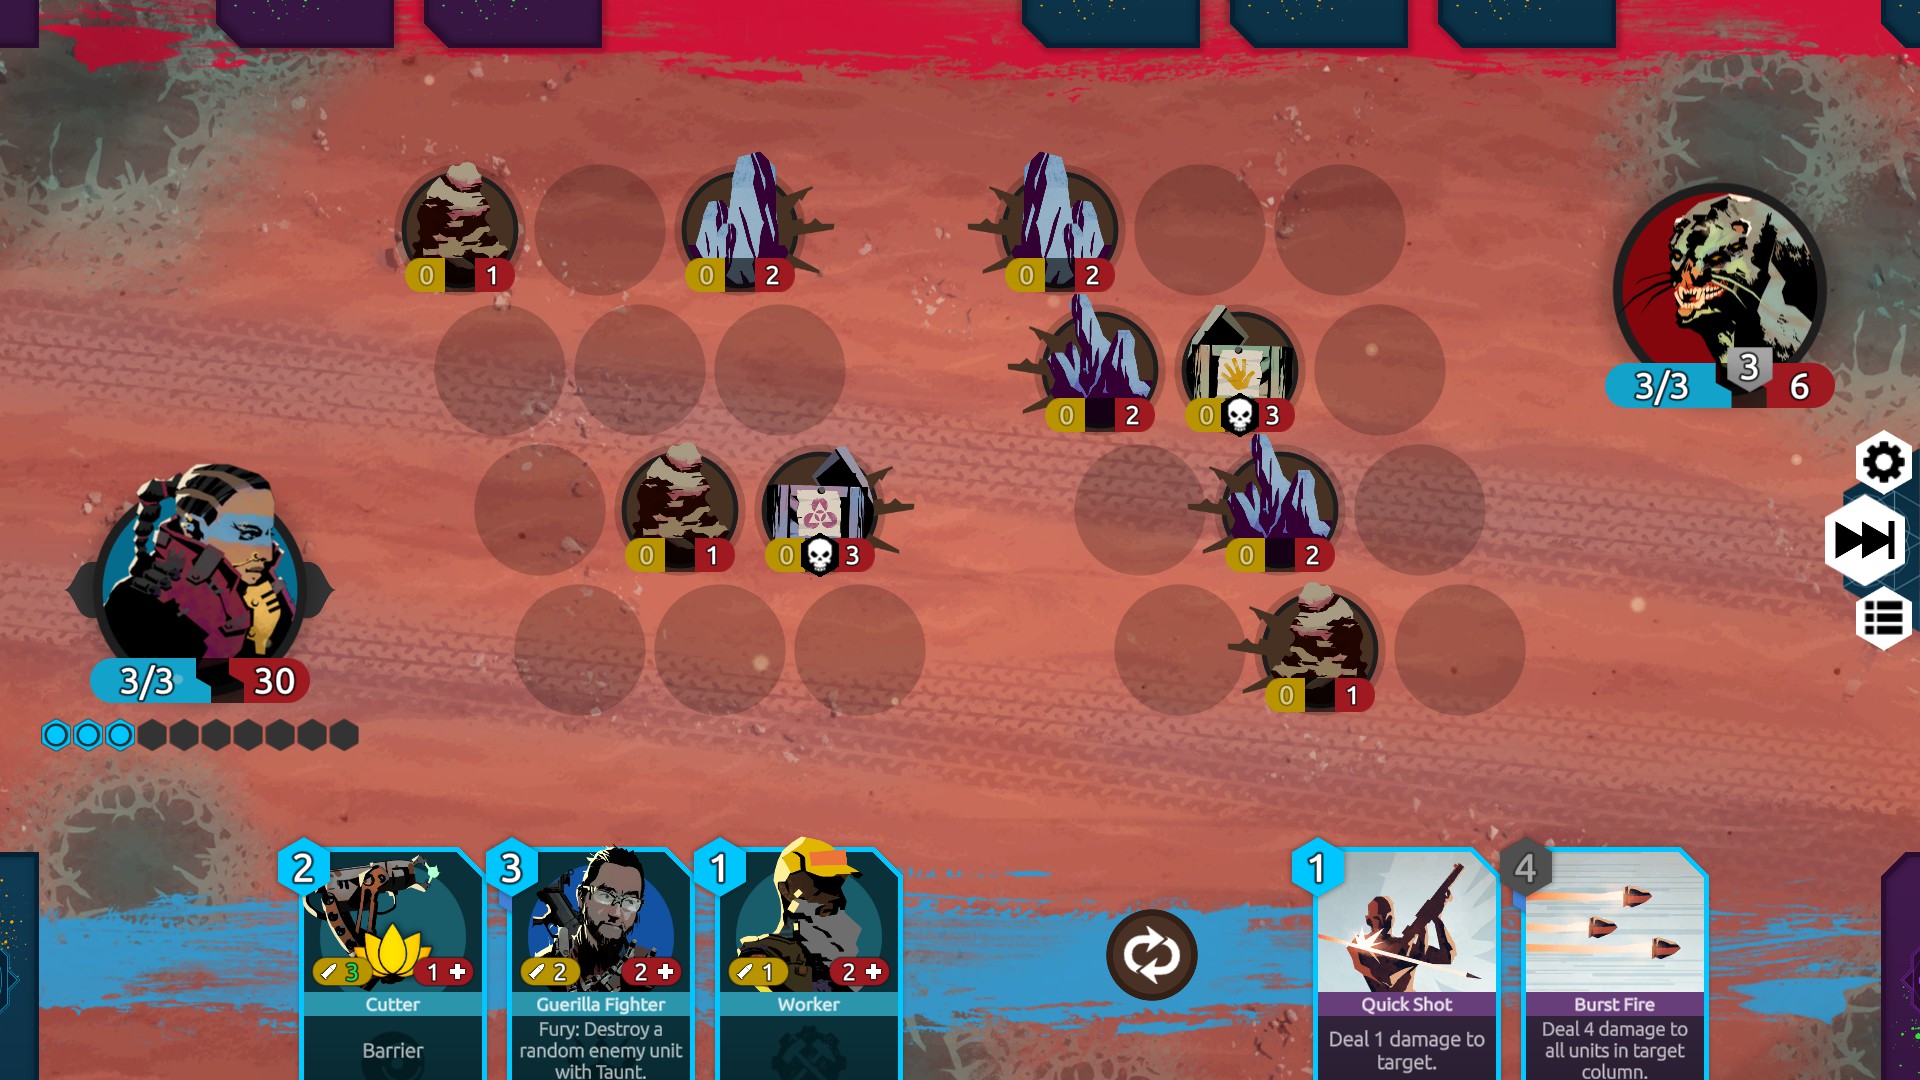
You start with two decks: your Convoy Deck and your Leader Deck. Convoy Decks contain your followers, which you’ll play like creatures in any card game. Your Leader Deck contains cards that buff, directly damage, or otherwise alter the state of play on the battlefield. You get three Convoy cards and two Leader cards to start, and draw one from each deck every subsequent turn.
The battlefield itself is a grid of rows and columns with individual spots of your cards and units to occupy. Followers on the field can attack (if they’re in the front of their specific row) either individual enemy followers, or the enemy leader directly. Keep in mind that the whole objective in the fight is to bring the leader’s life to zero.
Of course, things are never that simple. Other than followers, constructs can be build and placed on the map to provide some extra flair to fights. They can’t move or attack like followers, but they often provide steady boons to allies or debuffs and damage to enemies. Obstacles like boulders and trees can also pop up on a map, which can often be used as cover or some other sort of annoyance for attackers and defenders alike. Most obstacles a can be destroyed, and some even have special effects for doing so, like granting the attacker batteries and food, or exploding and hurting followers in surrounding positions.
Individual cards can be modified in numerous ways by the many keywords and effects they can have. Outside of special text effects, all of a cards unique effects tend to fall under three types of keywords:
- Triggers: Triggers are things that happen with particular conditions are met. For example: Fury is triggered when the card is first played. Other trigger keywords include Incite and Revenge.
- Effects: These are conditions caused by cards (often Leader cards). Pushing can send a unit to the very back of its row, causing everything behind it to move up on. Other effects include Pull, Blackout, and Stun.
- Follower/Unit: The largest variety of keywords appear on follower and construct cards as special abilities of theirs. Followers with Poison destroy other units so long as they do damage to them, no matter the amount. Other similar keywords include Sniper, Charge, Taunt, and Robust. This is, of course, not the full list, but you get the gist.
Gameplay Tips
- Use your Prophet’s focus points. Trimming as many unnecessary cards as you can from your Leader Deck will make it a lean, mean, drawing machine. You want to reliably get the cards you’re looking for as often as you can.
- It can be pretty easy to come by food during your travels, but items that give your party Hope are far less common. Be sure to hold on to these and don’t sell them until you’re sure you wont need it.
- Don’t be afraid to take the long way to your next milestone in order to stop at a rest point or a market place. Healing and opportunities to sell can be hard to find.
- When a battle starts, be sure to adjust your Convoy decks appropriately. If a battle looks like its going to be quick, shave the deck size down so you can draw what you want faster. Scale this core deck up as the battles get harder.
- On the initial draw, you can choose to redraw any of your Convoy or Leader cards. A good general rule is that if you can’t play anything in your first two turns from this hand, you should redraw. If you aren’t drawing into any good synergies immediately, that’s a good sign that maybe your deck is too big.
- Every turn, your allowed to scrap a card in either you Convoy or Leader hand. This discards a card and draws a new one. You should be using this often to draw into things that can be useful as quickly as possible.
- Effective use of obstacles as cover can make or break a strategy. Constructs and followers with passive abilities should be put behind cover. Weaker units can be placed in front of stronger units to act as temporary cover for them, as well. You don’t want to see your followers get hurt, but smart positioning makes sure that they won’t be wounded in vain.
The above should get your pilgrimage started right. If you need more guidance to get to the Crypt, come to our Nowhere Prophet Wiki!