Deep Sky Derelicts, Snowhound Games’ grim sci-fi RPG, is a dense beast. To find an alien mothership you can cash in for a reward you can’t refuse, you must delve deep into hostile environments in search of clues — hey, if it was easy, everyone would do it. In a situation like this, help is always appreciated. This beginner’s guide will put you in a position to get the most out of everything you’ll encounter in your journey.
Getting Started
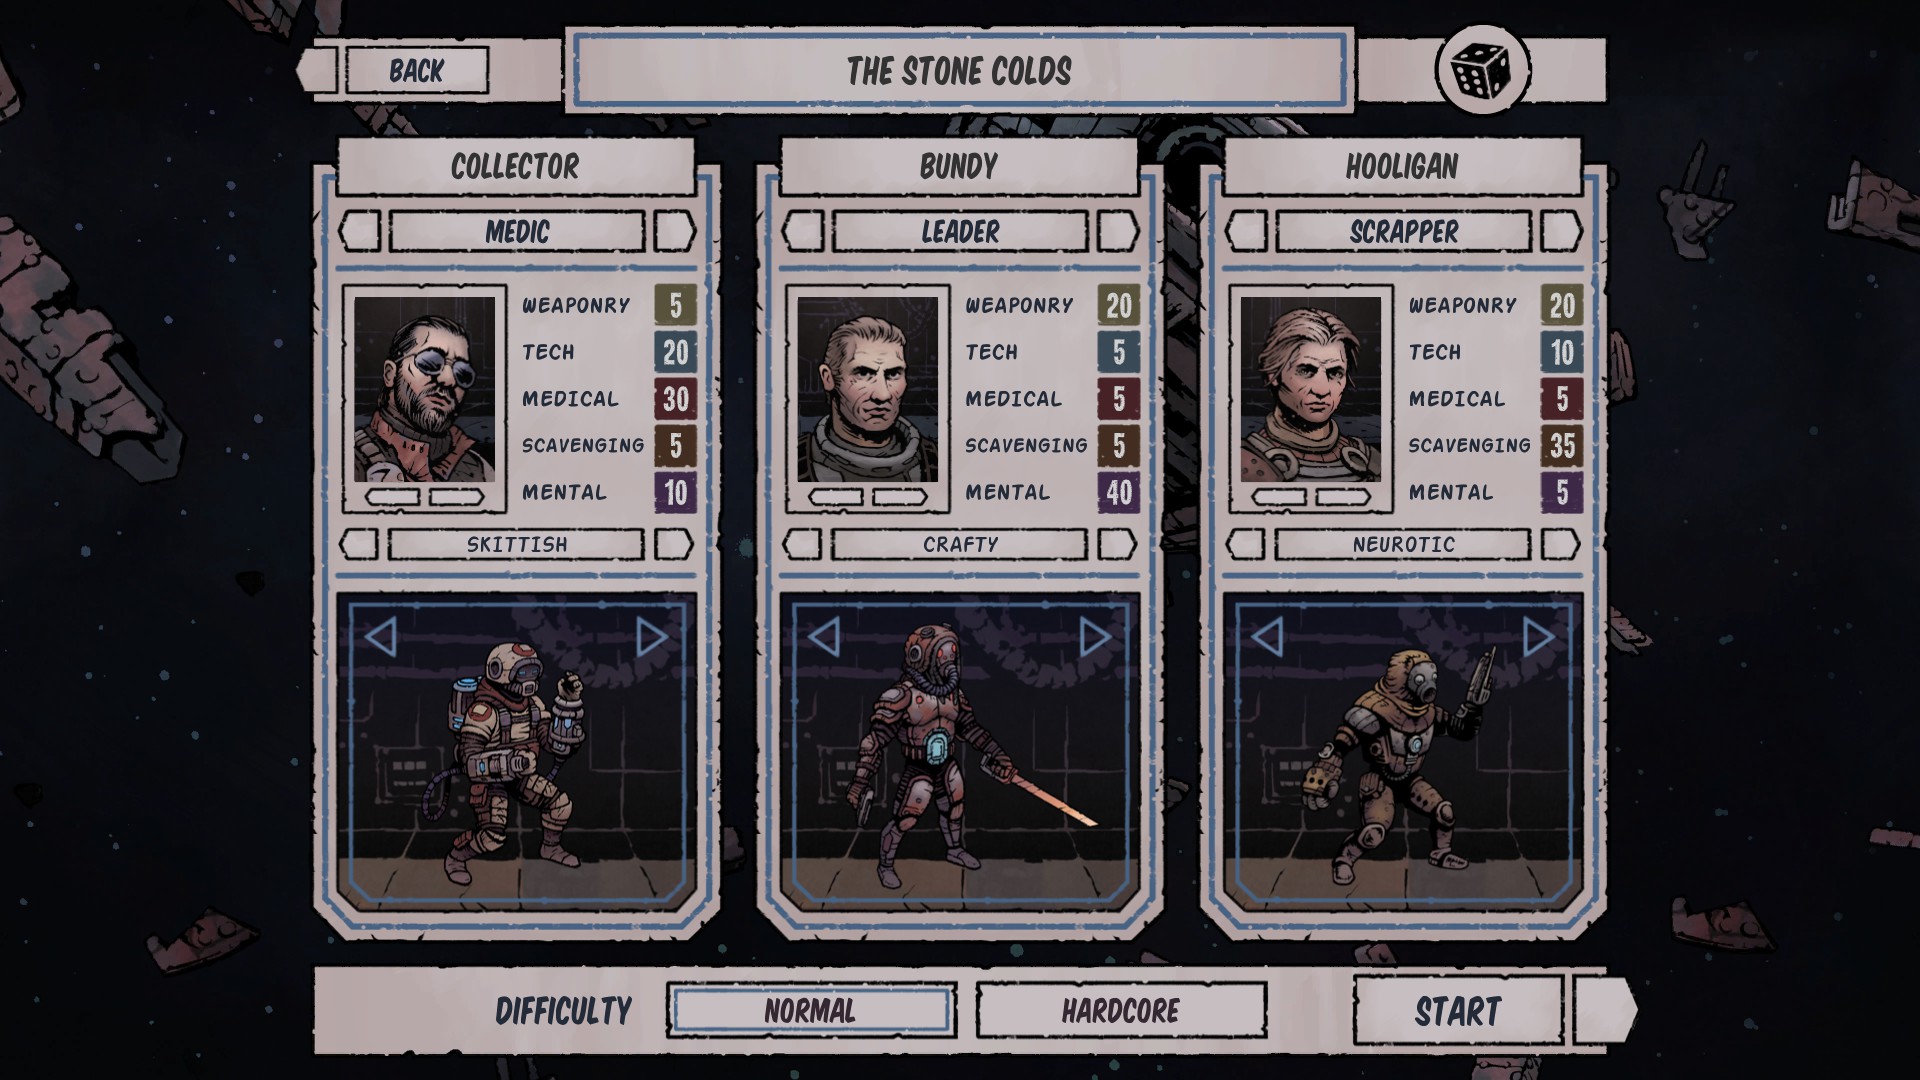
Before you can make any progress toward your ultimate goal, you need to assemble a crew. Your crew can only be three members strong, and there are many classes that can fill these spots. Classes determine the types of equipment each character holds and gives them some initial stat bonuses that helps them specialize.
- Leader – Leaders serve as inspiration for the rest of your crew and point people for negotiations. They have a ranged weapon and melee weapon, and a high Metal score.
- Tracker – Trackers are sneaky and kill with precision. Energy blade and precise weapons are their forte, and they have a high Weaponry score.
- Technician – Technicians support the group with their deep knowledge of tech, which is reflected in their high Tech scores. They can equip two tools.
- Bruiser – Bruisers are front-line fighters that taunt the enemy and keep them distracted. They use heavy melee weapons and possess high Weaponry scores.
- Scrapper – Scrappers always have a trick or two up their sleeves to turn the tide of battle. They use ranged weapons as well as a power glove and boast a high Scavenger score.
- Medic – Medics keep the crew going, patching them up so they’re ready to take more punishment. They have a ranged weapon and can equip two Medical tools.

Equipment
Tons and tons of equipment will come into your possession as you comb derelicts for riches and information. Each item modifies your combat deck, adding its own set of cards to the pile. Your whole deck is the combined sum of all the cards each of your items gives you. Generally, your items come in a few categories.
- Weapons – Weapons can be either ranged or melee. They can also be different types of ranged or melee, like pistols, precision, power gloves, and energy blades. Every class has a handful of these they can pull from.
- Tools – Tools add a utilitarian function to every class. This can come in the form of healing cards or specialized attacks that have high chances of causing status ailments. There’s a great deal of variety, most of which can be equipped by any class.
- Shields – Everyone has a shield device, which grants them a shield recharge functionality, among other things.
These devices can be altered further by mods, which add stat boosts and potentially even new cards.
Home Base
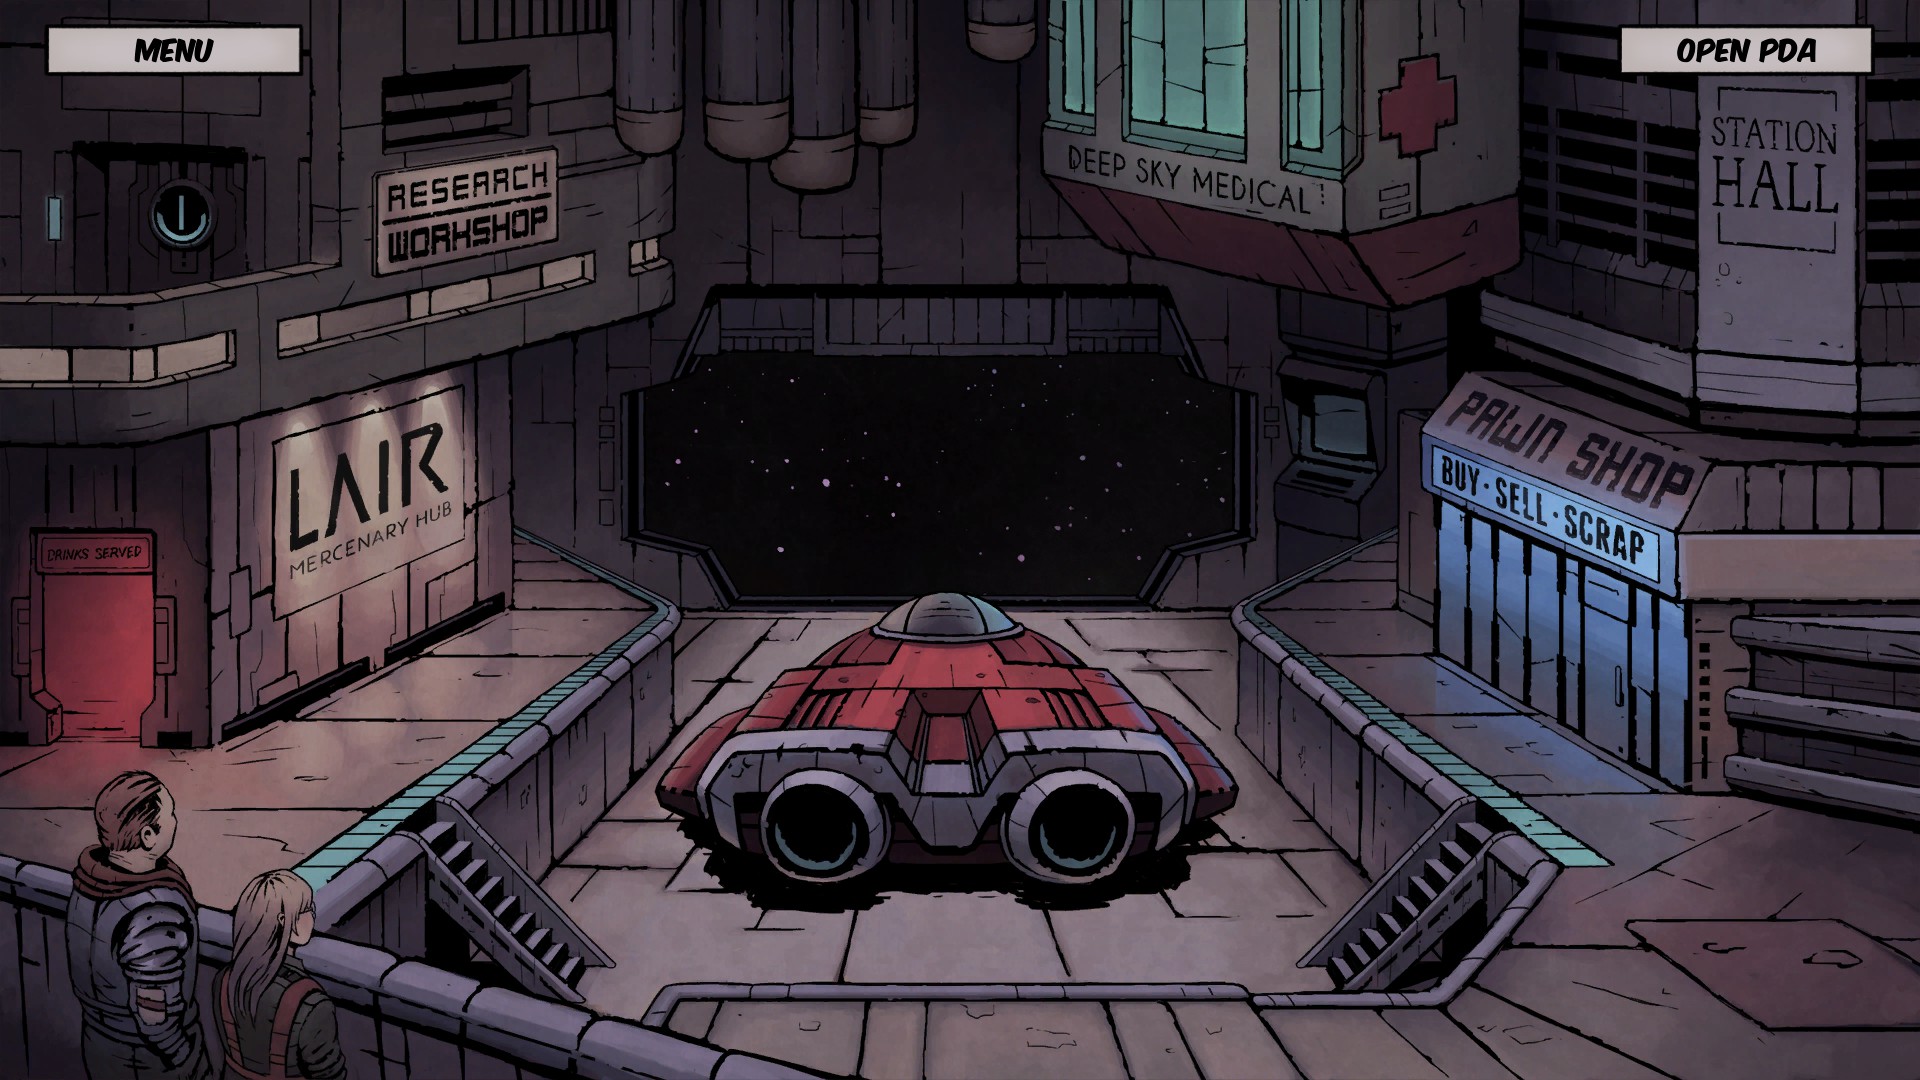
Here is where you’ll be stopping between missions. It’s a hub for everything you’ll need to prepare yourself for scavenging derelicts. There are a bunch of locations, each providing something unique and vital to you and your crew — if you can afford it.
- Deep Sky Medical – Where you go to get patched up. There are three levels of care, each with increasing cc costs. When you lose a crew member on a mission, this is where you’ll go to revive them.
- Station Hall – The office of the Sub-Governor. When you find data from the main consoles of a derelict, he’s who you’ll bring them to. His office analyses the data, and will periodically give you information on more derelicts to explore.
- Pawn Shop – The Pawn Shop is where you’ll buy and sell mods and gear. It’s also where you can sell your scraps and loot of various different values. Head here to turn your hard work into money!
- LAIR – The bar for mercenaries. Here, you will find quests either specific to certain derelicts or evergreen things to do during all of your missions. Rewards are usually substantial, so these quests are worth your time. You’ll also find new mercs for hire, should you want to replace one of yours as your adventures progress.
- Research Workshop – This lab is where you’ll go to upgrade your energy-related tech. You can increase scan ranges and lower general energy costs here, among many other things.
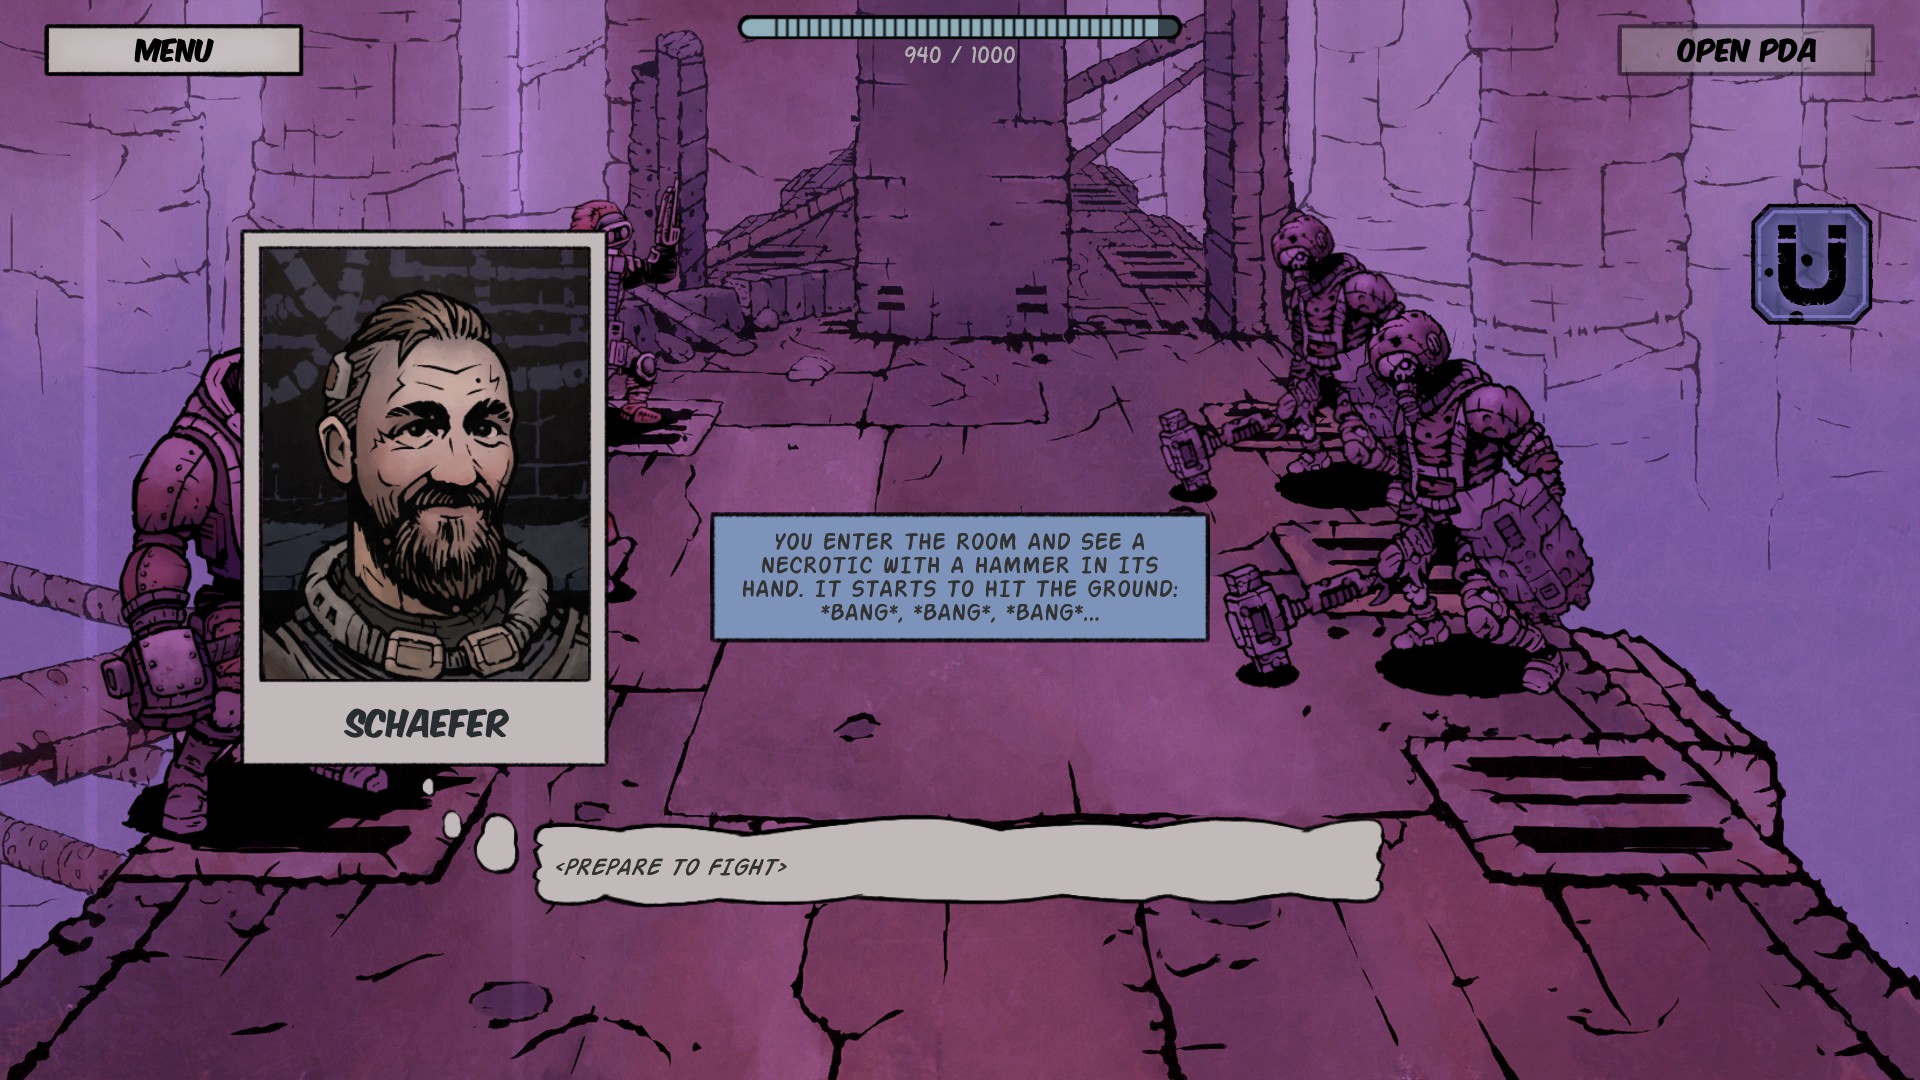
Exploring Derelicts
Derelicts are your bread-and-butter. Inside them you’ll find lost treasures, dangerous foes, and lots and lots of junk. Sifting though all of those things and getting to each one’s data core will give you the information you need to inch closer to the alien mothership.
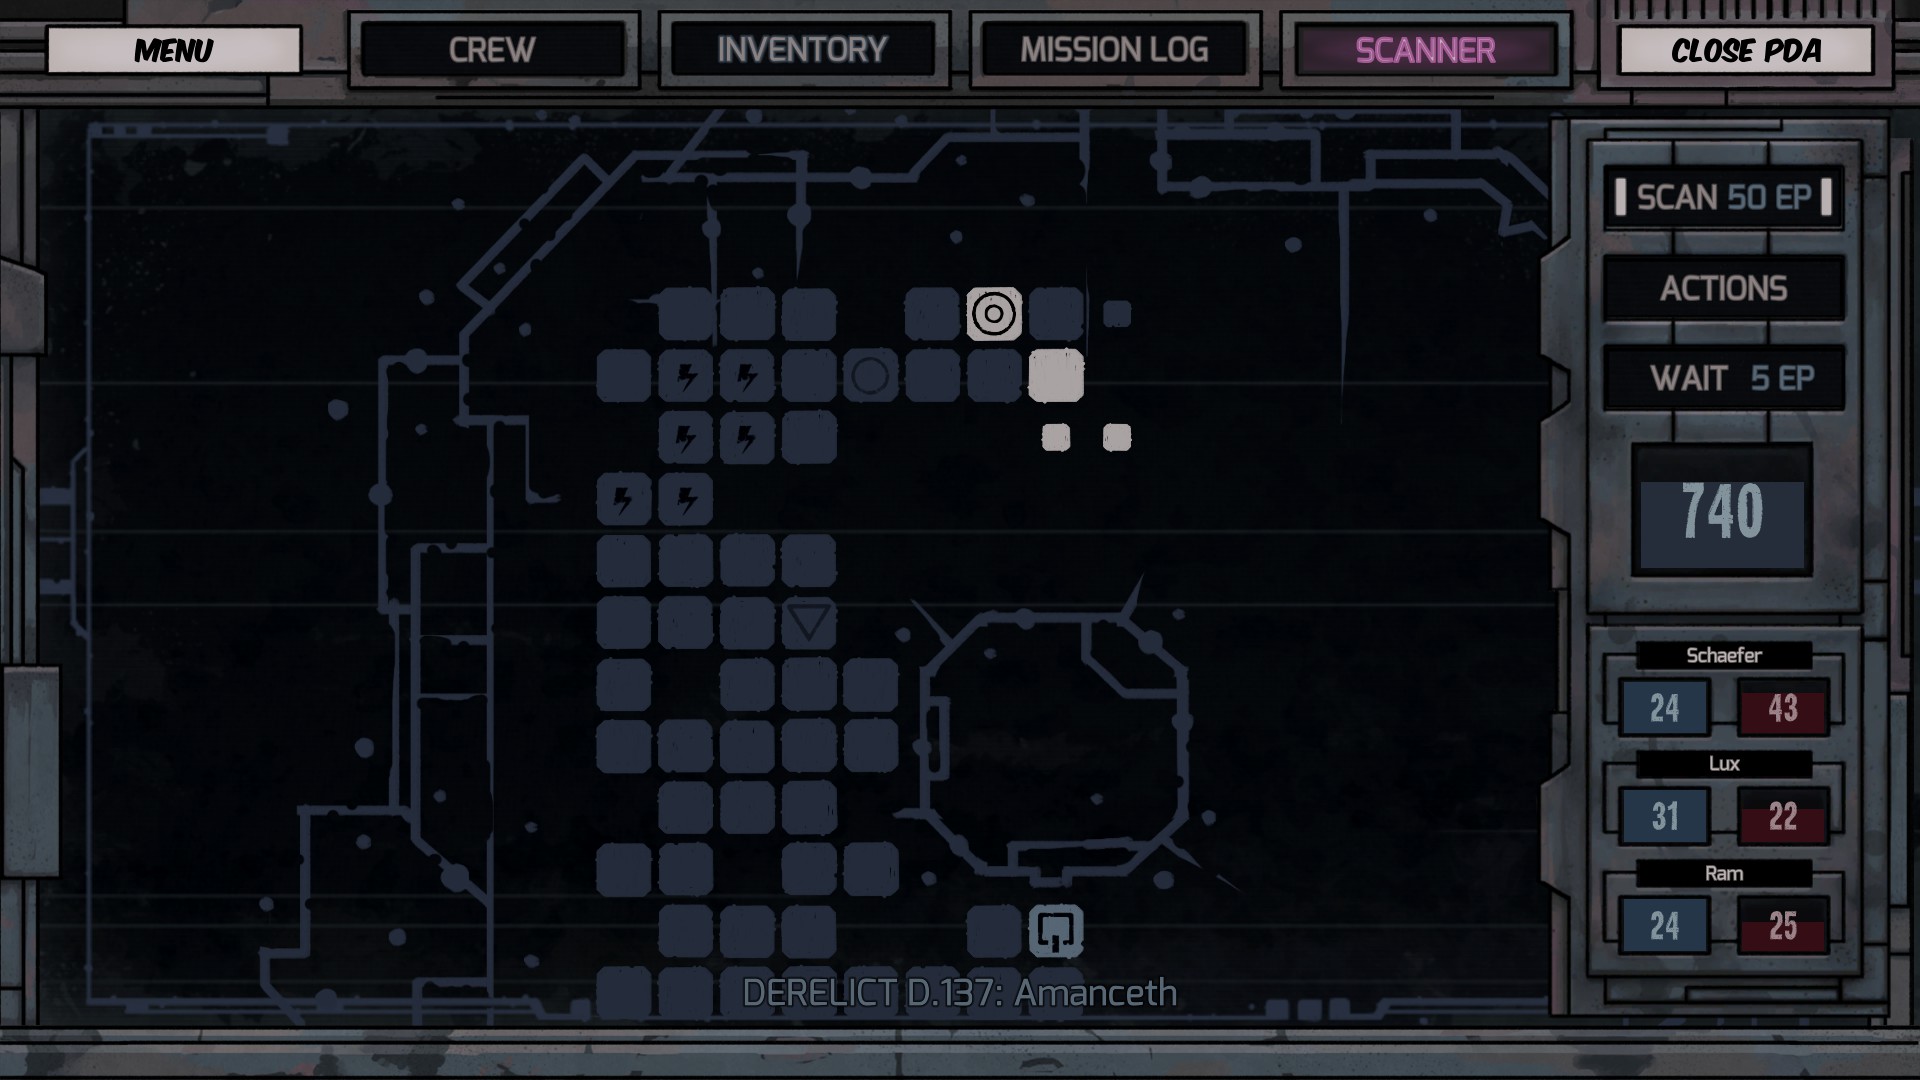
Most of your time in these scrapped ships is spent looking at the screen of the Scanner. It lays out the floor plan of the steel behemoth in white blocks. You’ll need to spend energy to move into each block. Since you can’t see further than a set amount of space in front of you, you need to choose whether to walk into the unknown, or scan ahead. Scanning takes a chunk of energy, but the information gathered can save you energy in the long term. These squares aren’t always empty, though. Ones with symbols hold a manner of treasures or terrors to behold.
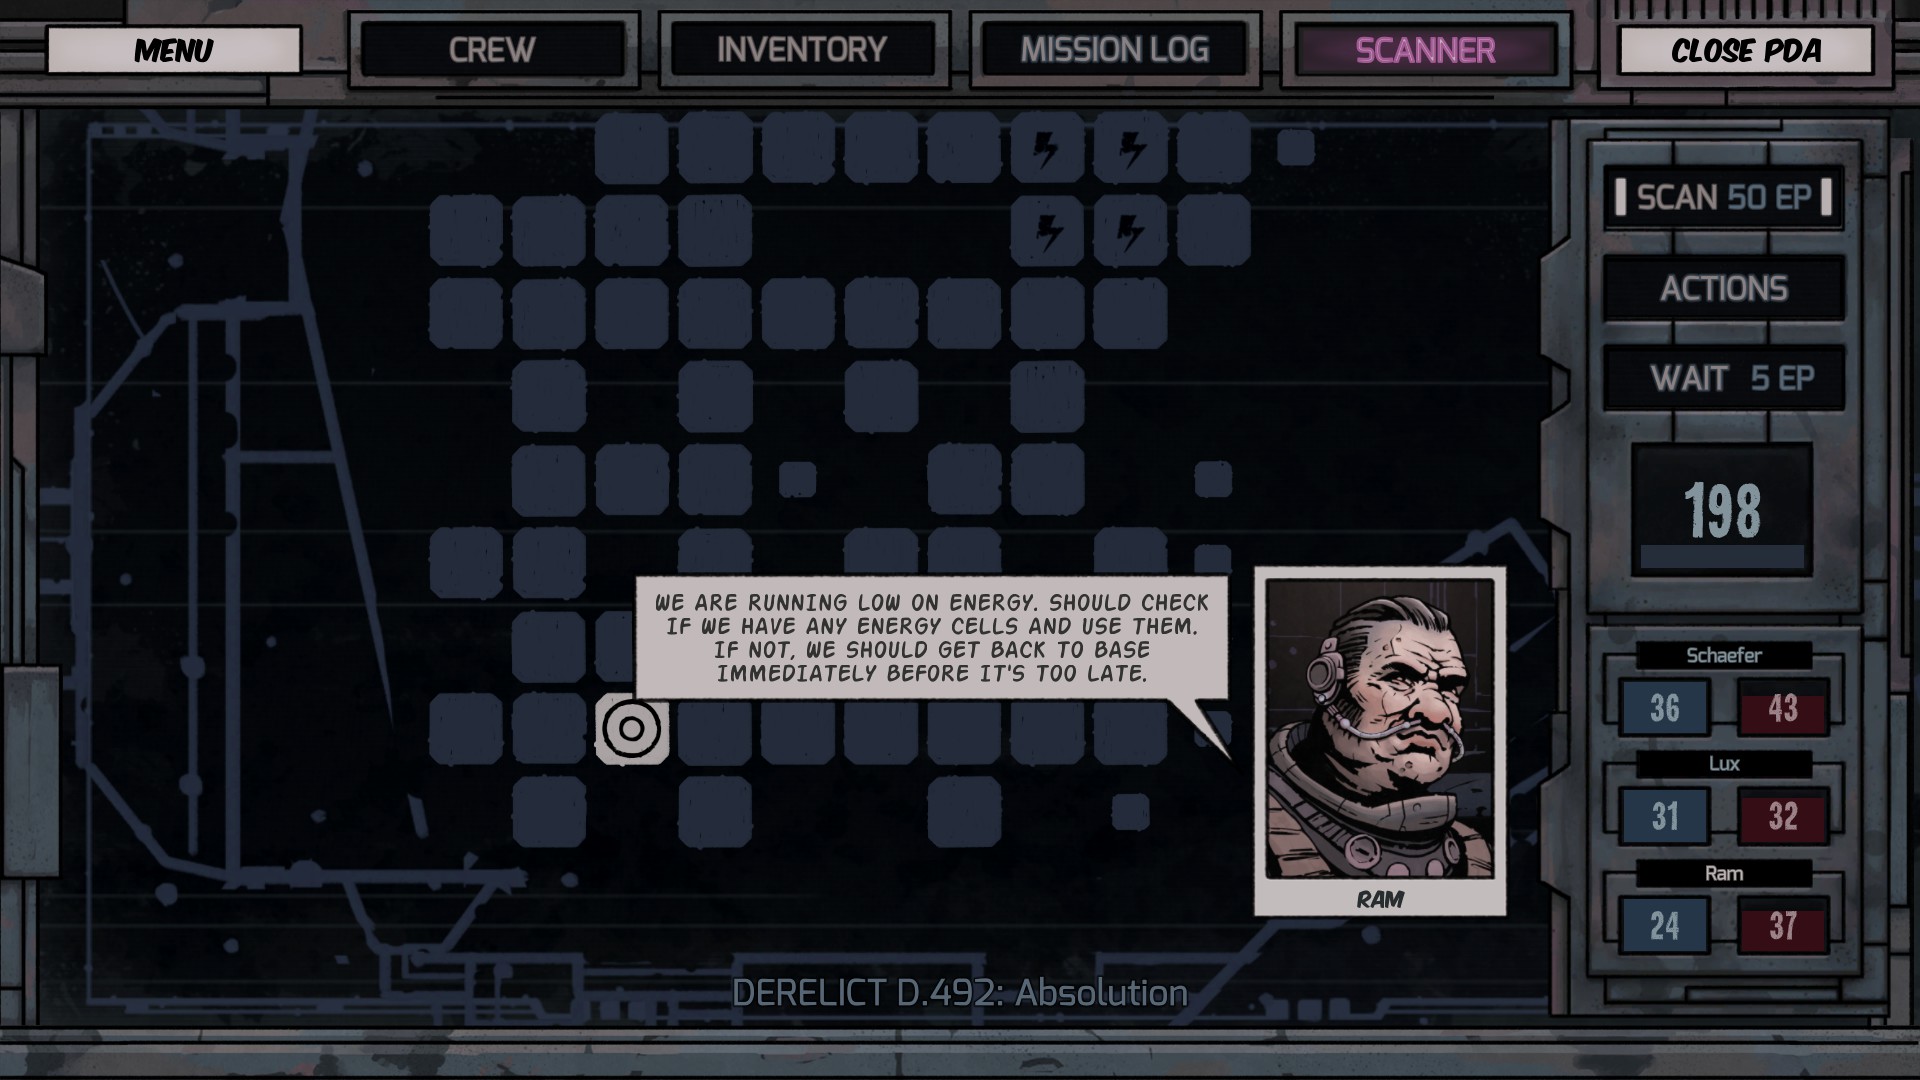
- Dashes – Squares with a Dash in them are locations to find scraps or items in. You always want to stop here if possible.
- Triangles – Zones with a Triangle in them are usually occupied by an NPC of some sort, be they quest-related contacts, wandering patrols of faction warriors, or hostile threats just looking to pick a fight.
- Circles – Areas with a Circle host important quest NPCs. They start out as triangles.
- Slashes – Spaces filled with a Slash contain debris. You can remove said debris by spending energy, or using an item to do it for you.
There is often more than one Docking Area on a derelict, which makes returning to them much easier. Finding a secondary dock should be a priority, after finding the cockpit or completing a side quest.
Your Energy Gauge is a key factor in exploring. You do not want to get caught too far out without a back-up source of energy. Use cells or recycle scrap to top yourself off.
Combat
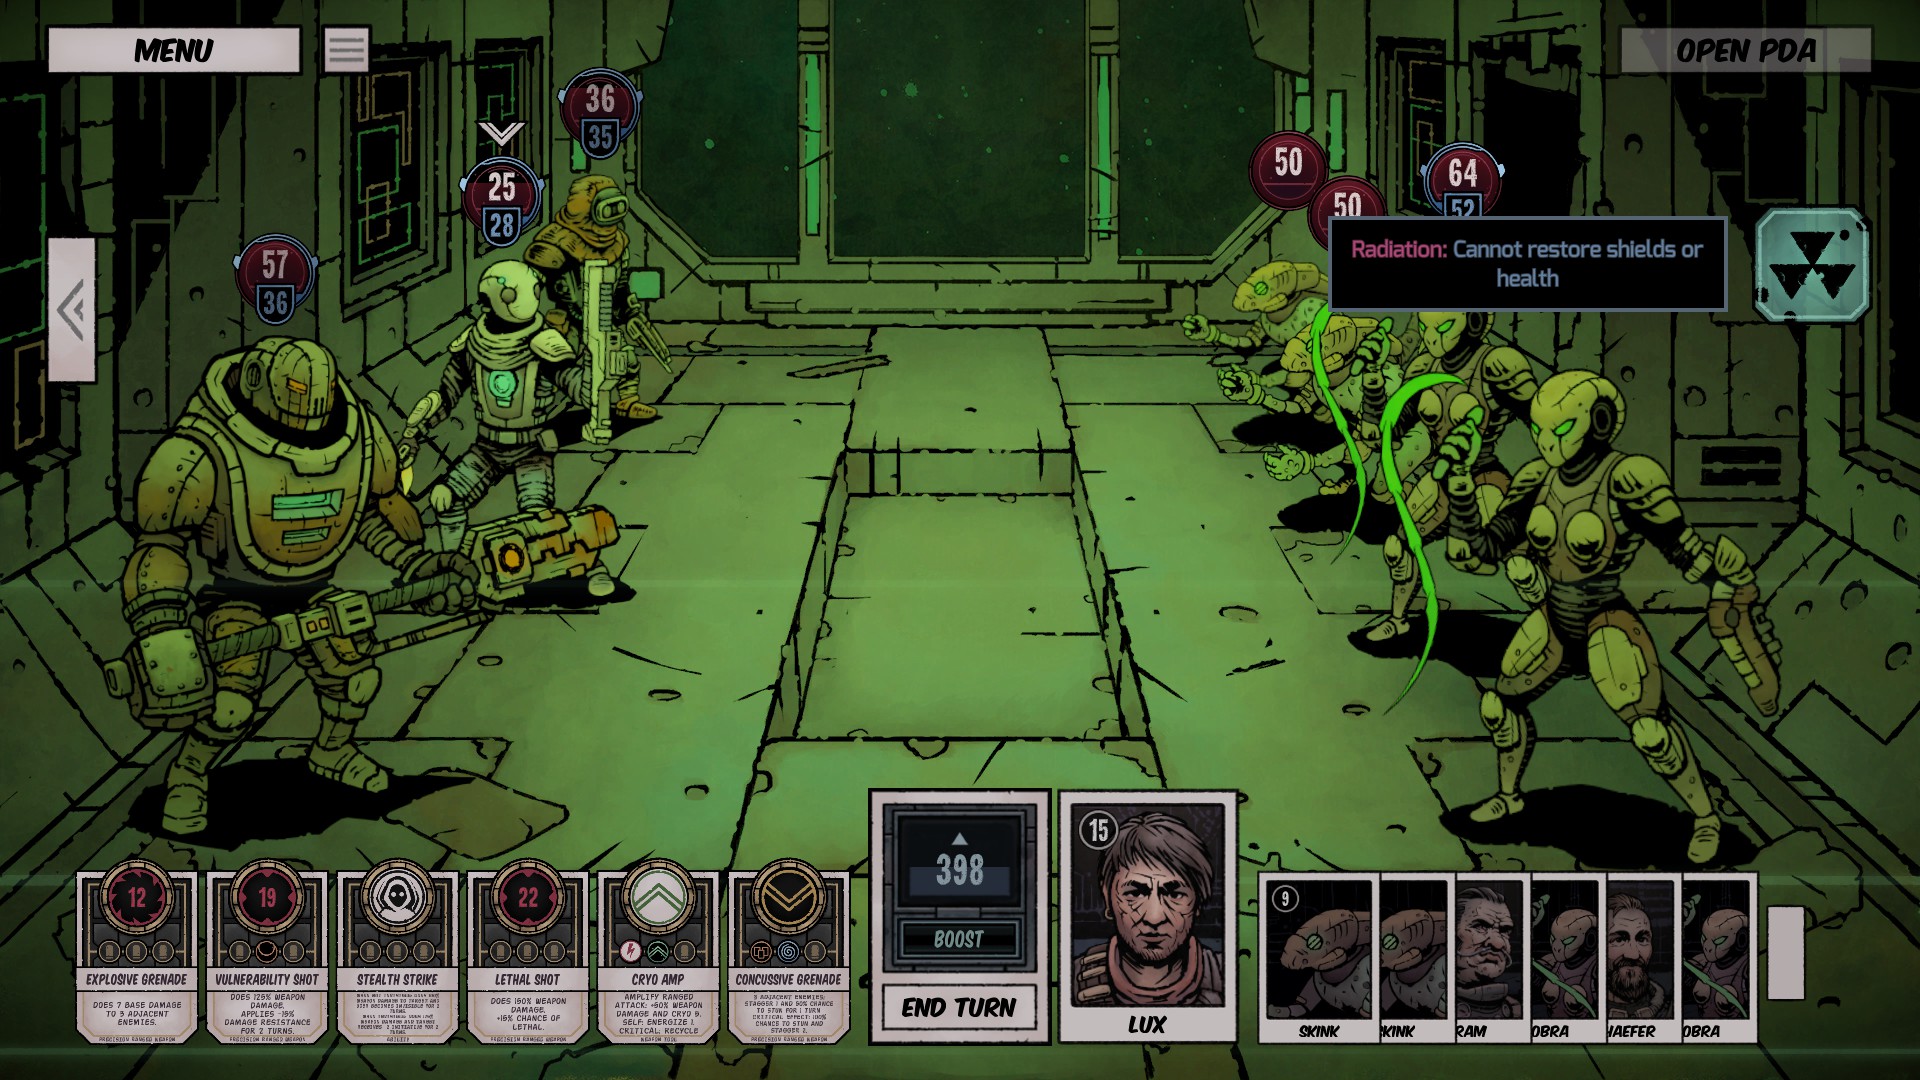
When you meet hostiles — or say the wrong thing and make someone want to fight you — it’s time for battle. Combat is done in turns, with the order of activation determined by an invisible initiative roll at the beginning of each turn. You can affect this roll by buffing your party or debuffing the enemy.
After that, cards are drawn and played by each character, doing a modified amount of your weapons base damage to one or multiple enemies. The big red number in the middle of the card will give you an idea of the damage you’re doing. Keep in mind though, final damage will almost always differ, and you can find out the actual number by hovering over the target.
There are other persistent room effects that will modify combat, too. They will show up on the map as colors and symbols:
- Energy Surge – These blue rooms are marked with a thunderbolt. They let you draw an extra card per turn, and have a 25% chance of energizing you, meaning you can play a second card. Energy Surge tiles also let you use some special items on the map.
- Magnetic Interference – Marked with a magnet symbol, these pink rooms give you a 33% miss chance on all ranged attacks. On the map, standing on these tiles will prevent you from scanning.
- Toxic – Toxic tiles are putrid green and are marked with a gas mask. While you’re in them, you will lose life gradually if your shields are down.
- Radiation – Dark green tiles that prevent you from regaining shields or health, both in combat and on the map.
Be very careful where you pick your fights, because these map conditions can throw a wrench in your strategy in short order.
Tips
The above covers all of the basic systems you’ll be interacting with in Deep Sky Derelicts, but there are more general tips that will help you survive these dungeons:
- Try to choose a party that can diversify their offense. You don’t want all melee or all ranged, for example.
- Remember that all classes can equip different types of Tools. So you don’t necessarily need a Medic to have healing abilities available to you.
- Check LAIR often for new quests and new mercs. You might find someone worthy of a spot in your crew.
- The energy amount you get through salvage often coincides with the sale price. Meaning the more energy you could get from a piece of scrap, the more it’s likely to be worth at the Pawn Shop.
- Don’t forget to research! The prices will seem high, but the continuous benefits you’ll get from seeing further when scanning and other such upgrades are invaluable.
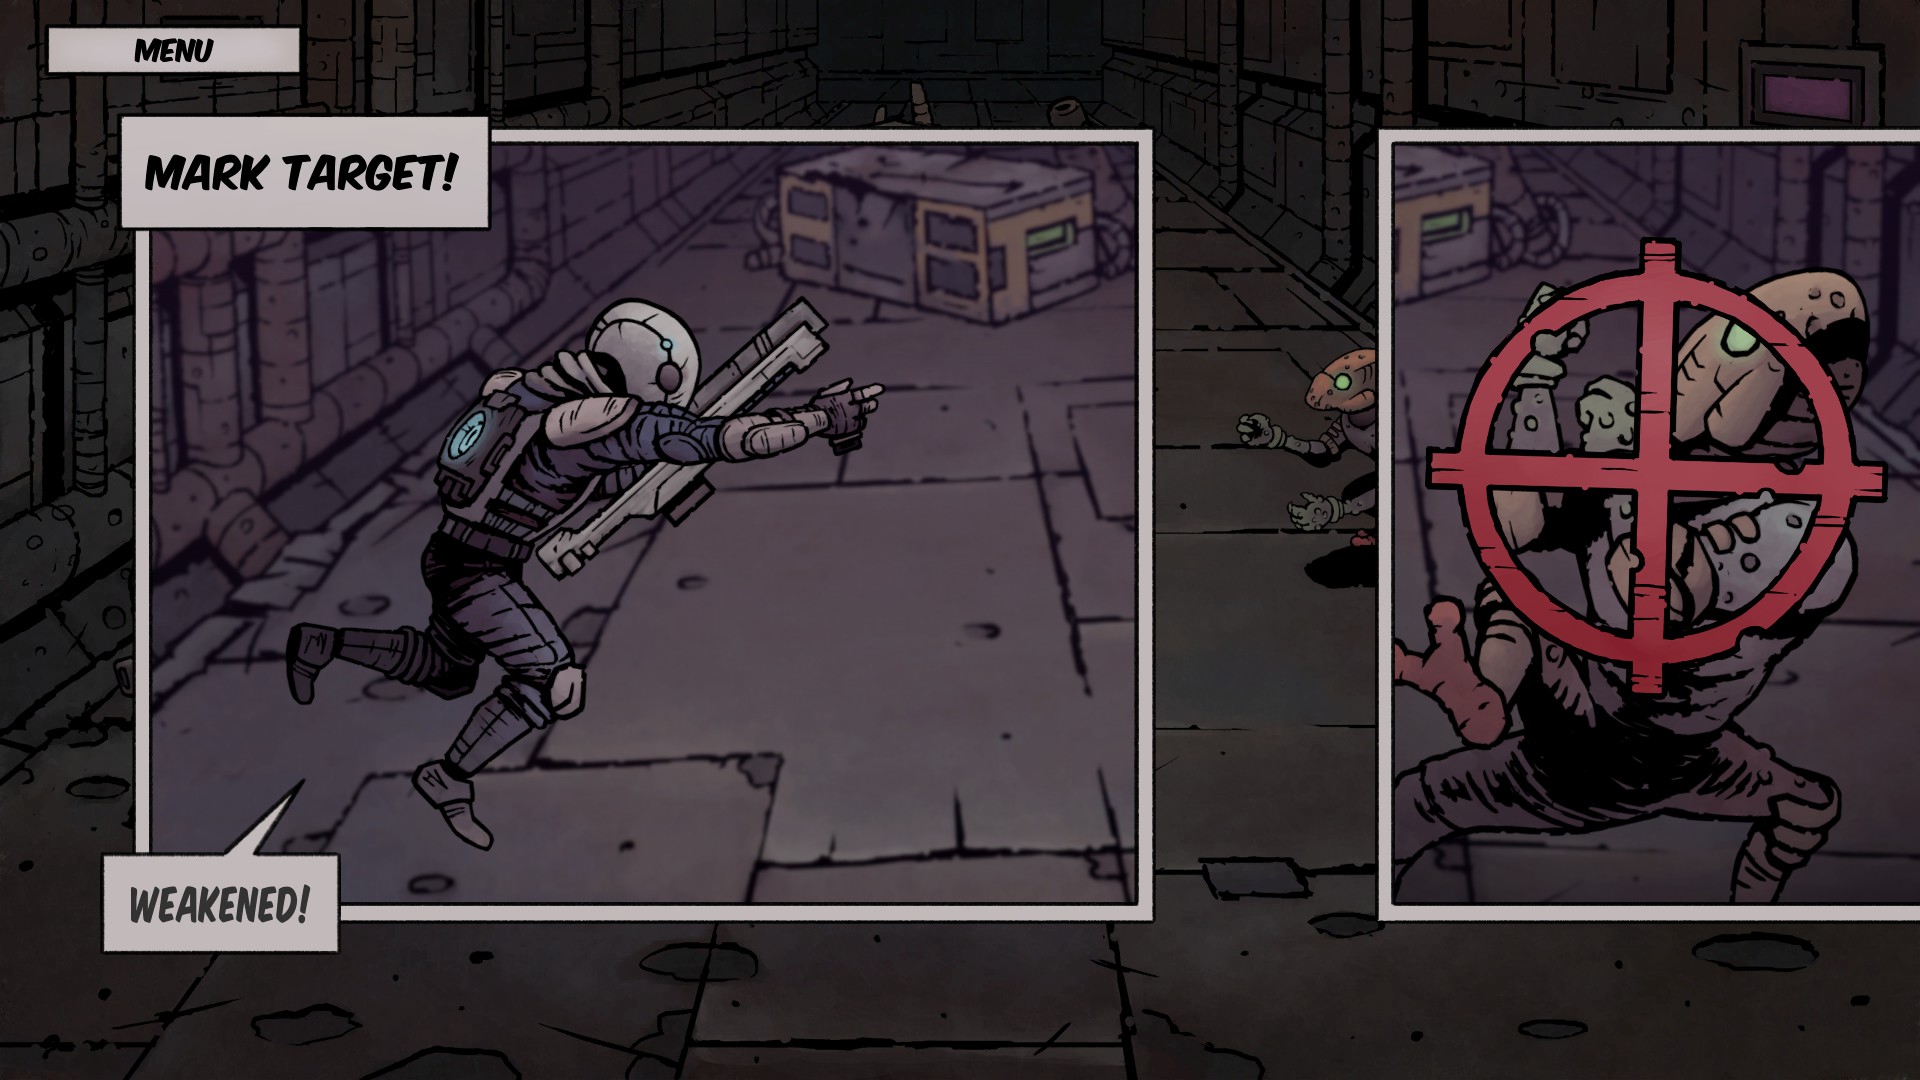
- Take full advantage of all of your status-affecting capabilities, because you’ll need all the advantages you can get as combat gets more and more intense.
If you need even more information on how to survive in the challenging and uncaring world of Deep Sky Derelicts, be sure to check out the game’s Official Wiki!
